Micro Gasifiers
- Disclaimer
- Introduction
- DJ-2
Lawnmower
- DJ-3 AC
generator
- Fuel
-
Dimensioning
-
Measuring
-
Scrap parts
-
Startup pump
-
Gas generator
-
Cooling and filtration
-
Mixer
-
Reheater
-
Engine adaptions
-
Tar and impurities
-
Summary
Micro
Gasifiers
Disclaimer
The information
on this
internet site has been composed with the largest possible care. The
writer rejects liability for possible loose ends, inadequacies and
implications. Moreover he is not responsible for damage, loss, injuries
or death, caused by DIY builders or producers, who have used the
information on this internet site.
Introduction
On this page I want to tell you, my dear reader, about my experiences
with micro woodgasifiers. Note that I mention my and wood. Others can
have different experiences and normally micro gasifiers are fueled with
charcoal. In the following report, I often state how NOT to do things
and point out what COULD work. I am only explaning how to prevent some
of your hairs from growing prematurely grey…
The language used, askes for a broad basic knowledge of wood
gasification. If you are a total newbee and a micro is the first one
you want to build, then I have to disappoint you. For a micro literally
everything needs to be perfect. Read the woodgas
“bibles” and gain experience with a larger, car
sized gasifier.
I’d like to name the Volvo gasifier DJ-1. The next one to be
fed with woodgas was an old, but sturdy ATCO lawnmower.
That’s DJ-2. Despite it’s sometimes gruesome
character and not very clean gas, it is my favorite. It is compact,
light, runs an hour on a few handfull woodchips and did only cost 20
euro. It asks for delicacy and patience on startup, but when started it
runs like there is no tomorrow.
In order to have emergency power and when I say
“emergency” I mean besides no electrical power also
no petrol nor batteries, I built DJ-3. It powers a 6 kVA Europower
generator.
Contrary to the spotless and without any concessions built stainless
Volvo gasifier, I used mostly scrap materials for both little ones.
Junk has some advantages: it’s easy and fast to get, cheap,
and no worries if you mess up with some parts. Excellent to explore
unknown area’s. And the builder gains some artistic qualities.
As you will read, micro gasifiers tend to mess up engines and grow grey
hair on the operators head. Like a wild unsettled
thing needing much patience, understanding and a steady hand. Do not
start building a micro, when your are wild and unsettled
yourself…
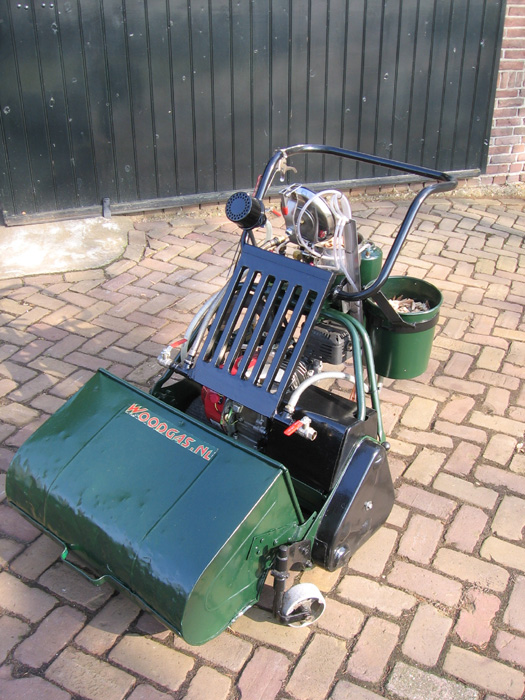
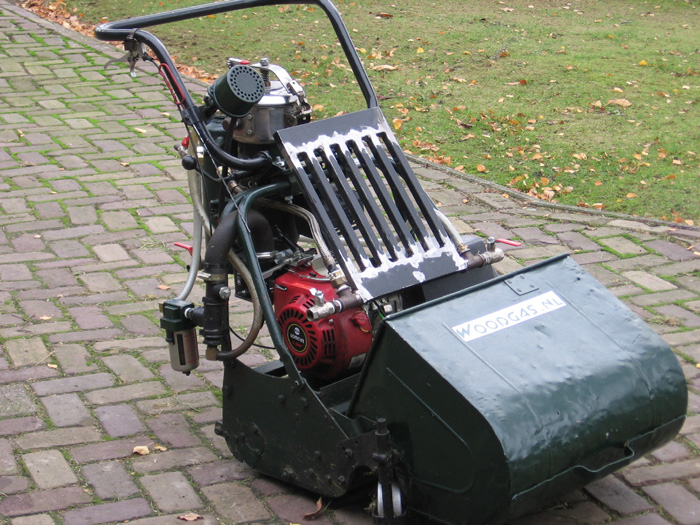
DJ-2
Lawnmower
Nicknamed “Tiny”. My ATCO lawnmower celebrated its
thirtiest birthday and I suprised it with a new engine. The old
Tecumseh was very tired and needed more oil than petrol. Bypassers
often thought it was on fire.
The new engine was a Chinese clone of a 5.5 hp Honda GX160.
Little money, but I recommend the original. It took me a long time to
find out that the average power consumption of the mower is only about
1 hp. And that, my dear friends, is crucial to know and understand. On
the other hand it is possible to walk an other route, as I will explain
later.
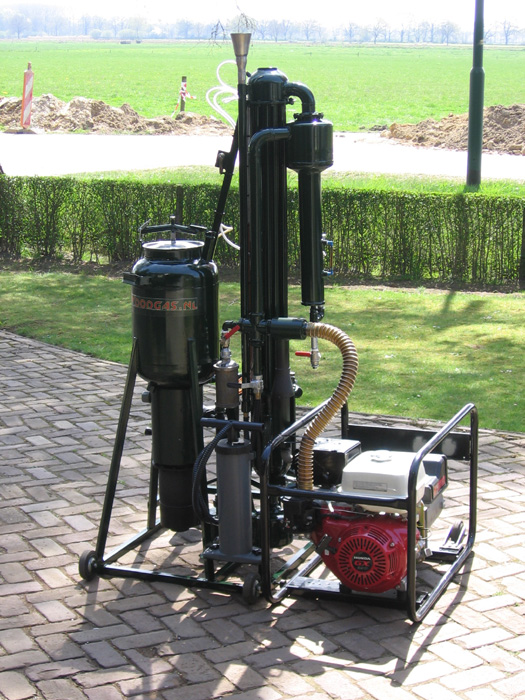
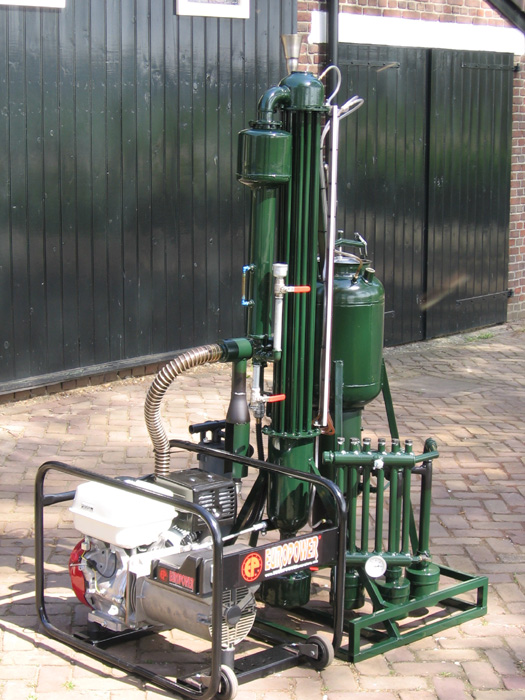
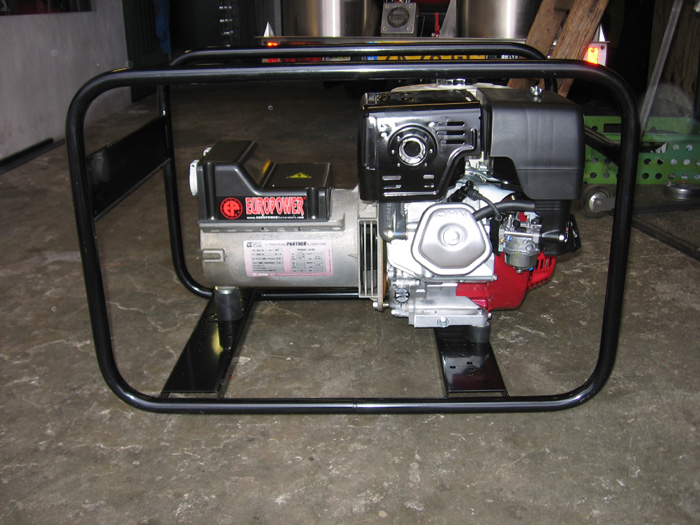
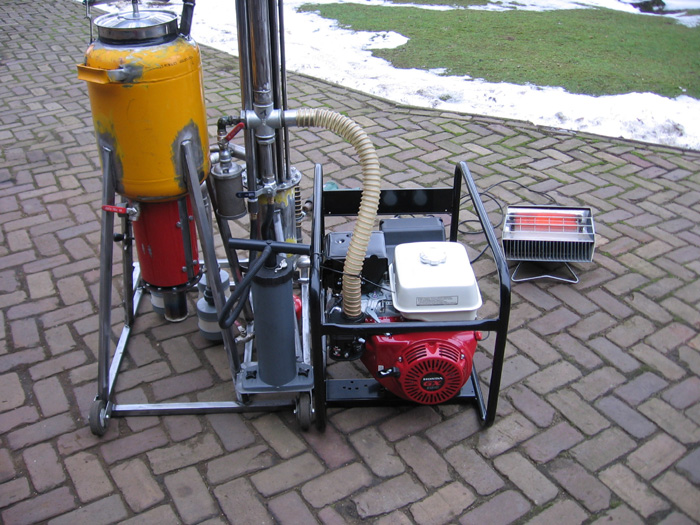
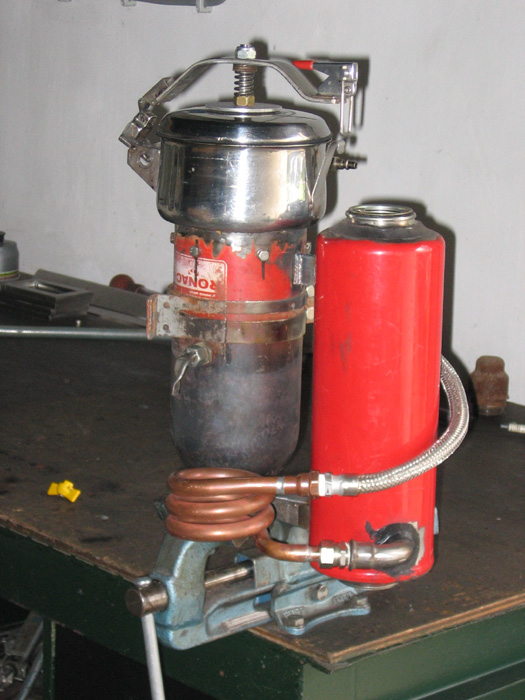
DJ-3 AC generator
Nickname “Dinyfier”, a tribute to my wife Diny.
How nice it is to have emergency power. For electric tools or to avoid
a cold house. To keep refridgerators running or to charge the battery
packs when sun and wind are down for several days. With the experience
gathered on Tiny’s new engine, I chose a sturdy petrol AC
generator. Europower has a very good reputation, because they use best
quality parts. Have a look at their website:
http://www.europowergenerators.com/
Goal was to have about 3 kWe on woodgas. The Europower EP6000 is able
to deliver 5.4 kWe continuously and 6 kWe peak. It’s Honda
GX390 can even handle 7 kWe peak. An excellent fit, because, as you
will discover, on woodgas generally only a maximum 60% of the power on
petrol can be achieved. Keeping the restrictive carburettor, reheating
the mixture and no extra ignition advance loweres this 60% further
yet.
DJ-3 delivers easily 3 kWe continious on woodgas. 4 kWe peak. Above
this number the voltage drops below an unacceptable 200 Volt.
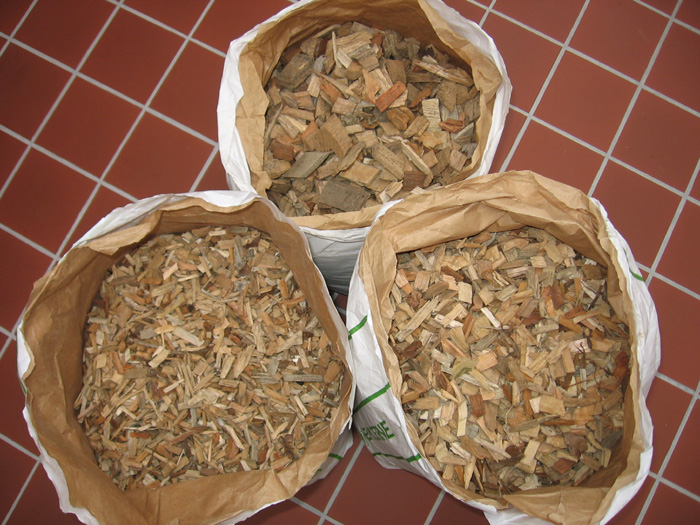
Fuel
Both your best friend and worst enemy. Woodgasification asks for a
narrow range of sized fuel. Micro gasification asks for perfectly
sized, shaped and dried woodfuel. Small bins and hearths tend to bridge
faster than large ones. Before starting a woodgas project, one should
be sure of a source that brings perfect shaped wood. Bad wood
makes bad gas, even when the gasifier is superb.
Moist content of the wood is best below 20%. Despite what often is
stated, 0% apparent moisture would be ideal, since no physical water is
needed for the highest hydrogen yield. The chemically bound water is
adequate. Average climates allow wood to dry to about 25% seasonally,
so you can gain some by storing wood inside or use waste heat from for
example the exhaust to dry it.
The wood I use at the moment: sieved wood chips, made by a large drum
chipper. It is amazing how uniform the chips become, when sieved,
although the fraction with the large particles, also contains too many
flat pieces. Flat pieces act in the combustion zone like small
particles and steal too much oxygen, starving the bigger particles.
Flat pieces also cause local bigger interstitial space. This space
collapses when the particle gets charred, causing an intermittent solid
fuel down flowing. Resulting in tarry gas.
The large fraction measures about 25x25x15 mm. The medium fraction
about 20x15x8 mm. The small fraction about 20x8x5 mm. Tiny likes the
small fraction, but also deals with the middle sized wood. DJ-3 eats
both middle and large. It is forbidden to put these fractions together,
because the larger particles can remain only partly decomposed.
Small fuel bins hate edgy, sharp fuel, like chips. They tend to bridge.
Not really severe hollow burns, but intermittent dropping down
instead of an ideal constant flowing movement. Adding a
stirring mechanism allows a steady flow, but complicates the system.
Despite the flaws, I still use chips, because it is all I have at the
moment. I recently (spring 2010) planted coppice willow and have high
hopes to harvest quality fuel within a few years. Willow is not very
dense, but yields high gains. The bark causes relatively more ash, but
a well designed and positioned grate can deal with that. A chunker and
drum sieve are planned to be built. Wood billets (short round length
cut sections) do not result in flow problems and are easy to dry and
sieve. As a purist, I like the wood to be grown locally,
preferably insitu.
On a maiden startup, the hearth has to be filled with charcoal. Micros
are very sensitive on type and size of this charcoal. Dust is
absolutely forbidden! Too big and hard of char pieces and they will
remain inert in the reduction zone for too a long of time. Use pieces
between 5 and 12 mm. The smaller beginning down on the grate with the
larger stacked on top to 30mm above the air nozzles.
Dimensioning
When an engine is not supposed to run full power most of the time, the
calculations mentioned in the car part of this website do not hold. You
need to know the asked power of the engine and do the calculation in
Appendix 1 of FAO 72 backwards.
Right…… here some sizing you will find no-where
else. Some gasifier designers will want to shoot me for revealing this
information:
The nozzletip ring diameter is partly determined by the fuel size. But
the other way around too. Average fuel size should be around 15% of
this diameter. Volume of the oxidation zone is between 6% and 10% of
the calculated cold gas volume per second, depending on the woodfuel
size. Reduction volume one-third to half of the oxidation volume. The
opening area of the grate is about the same as the restriction opening
area.
The air flow through the gasifier nozzles can be taken at a low 20-25
m/s, because of the small size of the micro’s. A produced gas
flow Superficial Velocity of 2.0 m/s instead of the usual 2.5 in the
restriction worked well for me, but depends on the fuel/char size. Note
that when char is very fine, it tends to pack, causing gases flow
restriction. That is why I like both the reduction and the oxidation a
bit wider, but shorter than usual. For tarfree operation you want it
narrow and long. It is a balance between low pressure drop and tarfree
gas. It is difficult to have both on micro gasification. It’s
a long proces of trial and error to find best possible settings.
Be sure that all sizes can be adjusted fast and easy. Your calculations
are just a starting point. Running the gasifier at full power and
measuring the pressure drop over the nozzles and over the hearth will
teach you where to make adjustments. I like a vacuum of about 8 cm H2O
over each of them. When lower, you get poor, partly reduced gas. When
higher, the cylinder filling degree of the engine gets lower, resulting
in less shaft power. Make adjustments and test, test, test. Make
several tests on one setting. Sometimes a cooling down and restarting
gives other results. Without any apparant reason. Over time, you will
agree with me that woodgasification is female…
Building the gasifier takes a relatively small part of total to invest
time. Testing and optimising consumes the greater part.
The Dinyfier has a restriction of 42 mm. The gas is tarfree, but
contains lots of soot, indicating that tars are cracked, but only just.
Tiny has a restriction of 22 mm. I stepped over a boundary there. The
gas is often not tarfree. It could be better if the gasifier was better
insulated, primairy air preheated and ideal coffeebean shaped fuel was
used. Nevertheless, the gas is clean enough not to stick any valves.
Some impurities settle in the restrictive carburettor, now used as a
throttle block. Tiny hasn’t run on gasoline for a year now.
It doesn’t even have a gas tank anymore. It runs on a weekly
basis.
Now the other, possible (I didn’t test it) route to walk:
micro’s have a small internal volume compared to their
external surface area, making them not very efficiënt. The
relatively large outer surface causes lots of heat radiation losses. A
bigger gasifier has relatively less losses and therefore a higher
minimum to maximum good fuel gas production turndown ratio. Fuel flow
in a bigger gasifier is better. So if you were building a larger
gasifier, where the engine demanded fuel gas supply more easily remains
within this wider turndown ratio, clean gas can be produced.
On a micro sized gasifier it depends however on the developing skills
of the builder to design a super insulated gasifier that puts as much
waste heat as possible back into the primary air and the woodfuel to
widen the narrow turndown ratio.
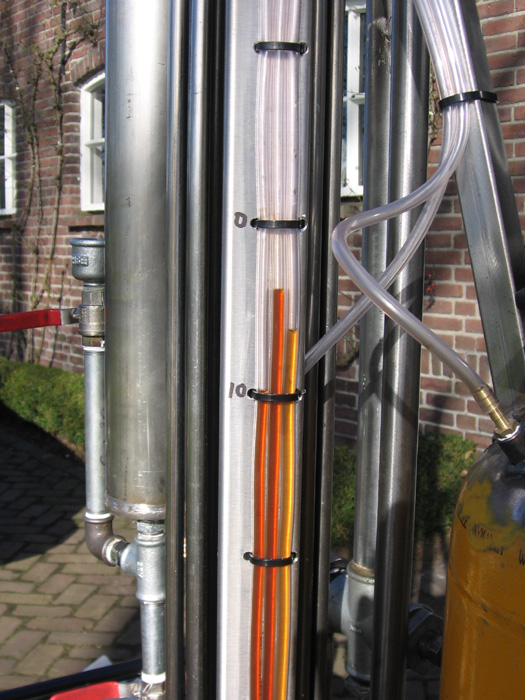
Measuring
You are obliged to measure vacuum. Having a thermometer in the gas
outlet of the generator is also helpful. Not in absolute sense, but to
have an impression in different circumstances. Therefore it is not so
relevant where the actual position of the thermometer is. An ordinary
central heating gauge can be used, but needs to be further downstream,
or you will overheat it.
Vacuum measuring is important, because it is your teacher. Without
measuring the pressure drop, you have absolutely no idea what is going
on in the gasifier. It is very easy to construct a dead simple, but
very accurate manometer gauge. All you need is a U shaped clear hose
filled with coffee colored water. Actually you need at least three of
them. The first one has one side attached to the fuel bin. The other
side is open to the air. This loop measures the pressure drop over the
nozzles.
The second loop is attached somewhere between the generator bottom and
the cleaning train. The other end of the U is Teed in on the bin line.
The second loop measures the pressure drop over the hearth.
The third loop is connected over the cleaning train.
The second loop is the most important one. It tells you what is going
on in the hearth. Often the vacuum is high on startup, but drops once
everything is settled. Like I told before: I like the vacuums over the
nozzles and over the hearth to be both about 8 cm coffee.
Note that a high pressure drop over the hearth (plugging) lowers the
pressure drop over the other two loops. Hint: an extreme low pressure
drop over the hearth, high gas temperature and loss of power tells you
either urgently need to refill the bin or kick the gasifier in order to
deal with a hollow burn.
A high pressure drop over the system will restrict gas flow supply and
ask for more choking of the engines secondary air supply, causing an
even higher pressure drop over the system. You will need to experience
yourself how everything is related.
So please invest in some hoses, coffee and a slick brain. It is the
best value-for-money-teacher you can get.
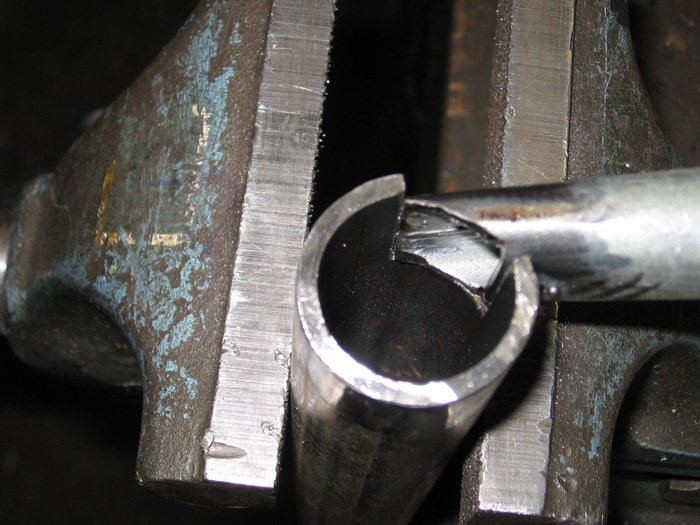
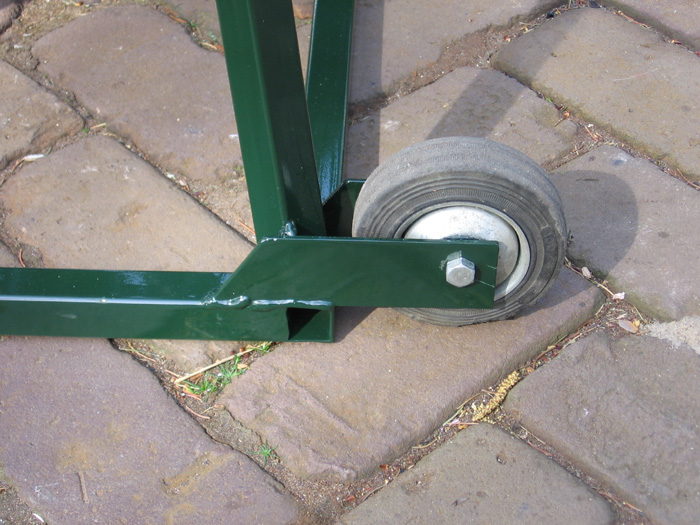
Scrap parts
How refreshing it can be to use junk when one is surrounded by shining
new stainless steel! It also challenges the creative mind, saves money
and is morally a right thing to do. Drawback is the concessions one has
to make. Sizes are hardly ever optimum. Building the ideal dry
filtering drum is nearly impossible with junk parts. Wet filtering is
about the only way to go. Effective heat recapturing is also hard.
If you want a perfect design, scrap is not the way to go. But in order
to gain experience it is good enough. In case of an emergency or a low
budget, junk is often the only available material source.
You will recognise several used parts: propane tank (fill with water or
inert welding gas before cutting!), fire extuingishers, cooking pots,
kitchen door hinge, egg-box clamp, central heating tubing and fittings.
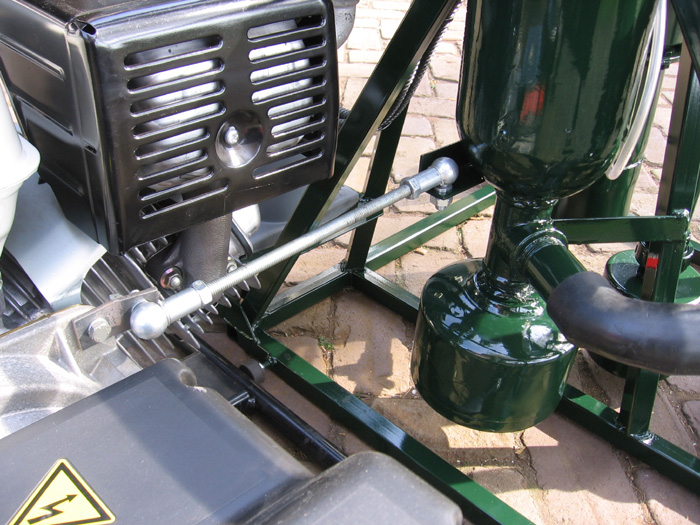
Startup pump
Sometimes things are so simple that you look beyond them.
Micro’s can easily be started with a double action airmatress
pump. Either blow in primary gasifier air or have it at the end of the
cleaning train or even past the mixer. For pumping in primary air, it
will have a long life expectancy, since it does not gum up by dirty
startup gas.
Pumping is best without much pulsation, which can be done when the
vacuum gauge hoses are in sight. Do pump long enough. Having the gas
lighting is not enough. I always like it to get an orange flare
appearance, which comes after purple.
Starting the gas producer generator is very easy: while pumping you
hold a cigarette lighter or small torch near a nozzle for a few
seconds. The flame is sucked in and lights the char instantly.
Do not overpull the system and DO tap or poke the fuel stack a few
times during startup pumping. The absence of a vibrating engine leads
to a possible hollow burn and total combustion of the char in the
hearth.
Starting the engine: have the secondary engine air control valve nearly
closed while cranking and slowly open it. Once it starts, it will need
a bit fiddling to overcome the always present “weak
moment”, where the engine wants to stall.
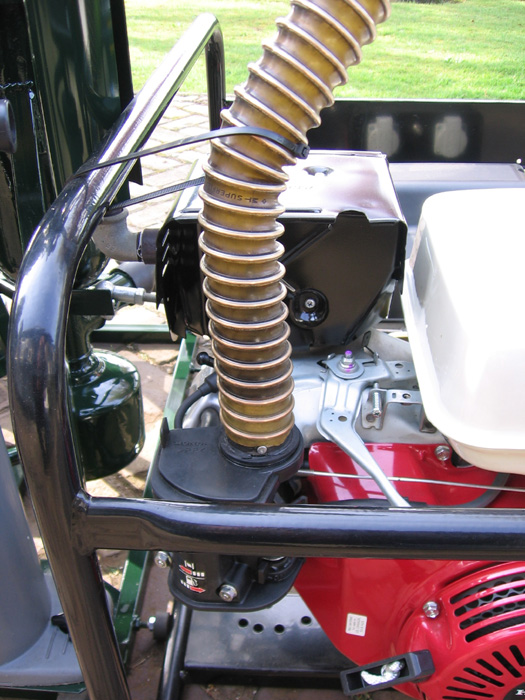
Gas generator
I attached a pencil drawing of the gas generator hearth of DJ-3.
It’s design is compromised by the available parts. Some
general, but important remarks; of which some are not taken care of in
my design:
-The hearth parts should always be made of thin walled stainless steel,
with good ash-insulation around it. Keep the heat inside.
-The outer shell of the gasifier should be insulated. Keep the heat
inside.
-Put as much heat back into primairy air and the fuel. Keep the heat
inside.
-Avoid heat sinks. Thick materials need time to heat up and allow dirty
gas to be produced long after the engine has started.
-A natural insulation ash cone for the oxidation zone does not work for
micro’s. They need the slick and fixed surface of a stainless
(or ceramic) cone.
Make it widely adjustable:
-Nozzles made of bolts. Easy to adjust length or change them.
-Oxidation/reduction assembly in height adjustable.
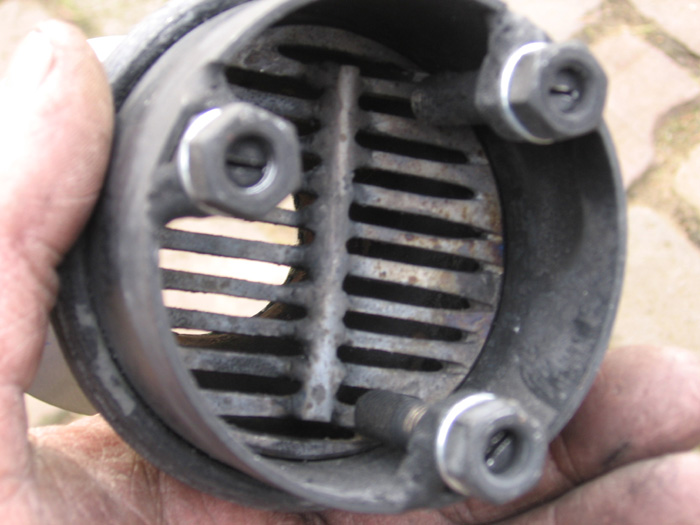
-Grate in height adjustable.
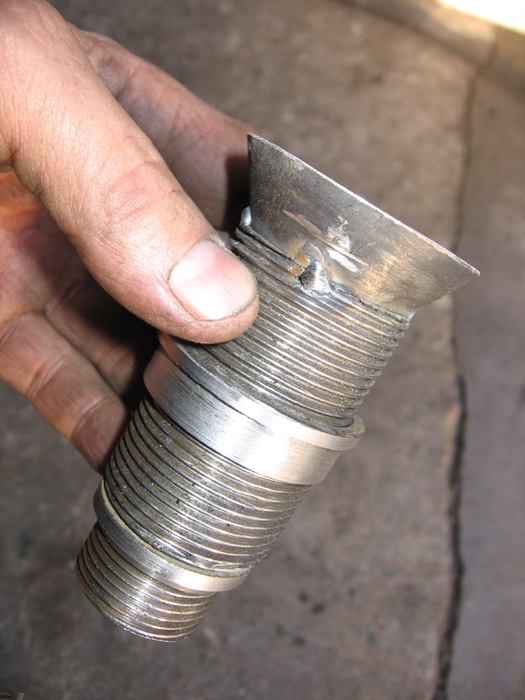
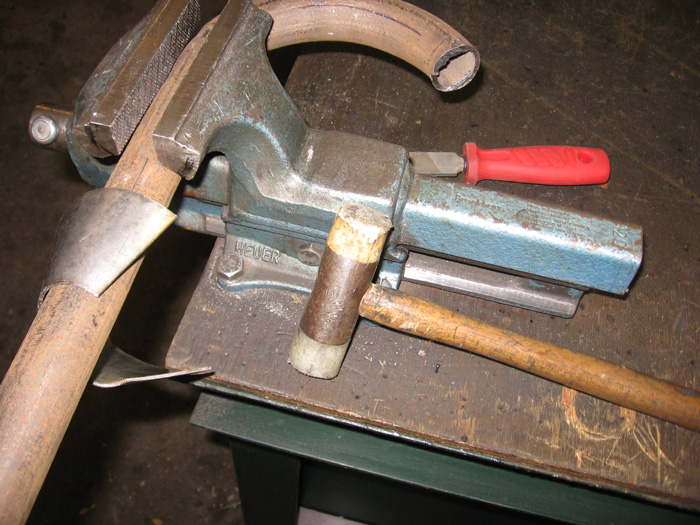
The grate has a shaker. Few elbows made of threaded bars. Seal and
bearing is a copper compression fitting. Replace the compression
cylinder by graphite cord. You may need to drill the
“chamber” a bit wider in order to obtain a longer
sealing surface.
Make neat welding seams. Any leaks will allow air to be drawn in,
combusting part of the hot gas. If you seen any white spots in the
otherwise black area’s downstream of the grate, you have an
air leak.
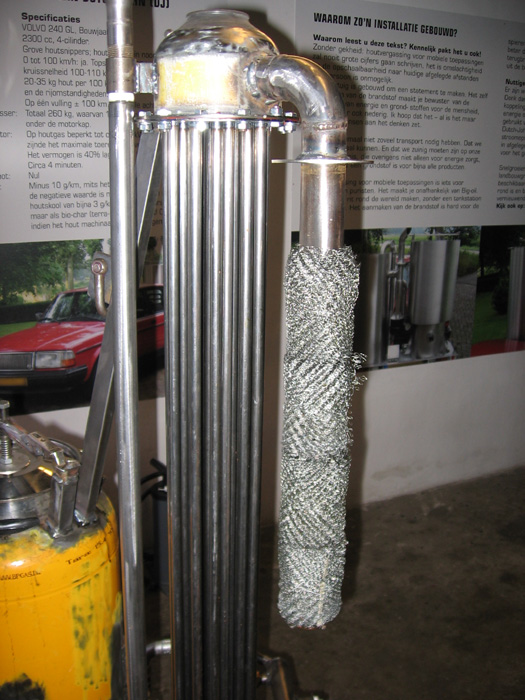
Cooling and filtration
Tiny has one cooler, between cyclone and wet chip filter.
It’s is custom made of junk rectangular tubing.
It’s top can be removed in order to wipe out the tubes. In
first 2/3 of the vertical pipes the gas goes up, in the other 1/3 down.
So even the up-part is flushed by condensate.
Note that there always is a point where condensation starts. This point
is prone to accumulate a dust and condensate mixture, choking the
system over time. On hot dry filtering this point is after filtering,
so no accumulation. On wet filtering this point is best in the filter
or, less good, in the cooler. But never somewhere in tubing!
The first used junk cooling spirals act like tubes and plug. The near
horizontal tube is not scrubbed because of the flat angle and because
of the high gas speed.
The Dinyfier has two coolers. One pre-cooler. The poor heat exchange in
the generator leaves the gas too hot for the wet filter. So it needed
some cooling before entering the filter. The second cooler on top of
the filter allows condensate to drip over the wet filter medium. Either
woodchips or clay granulate can be used as medium. Wet filtering is
however never as good as hot dry filtering by means of heat resistant
fabric. Make its volume bigger than I did.
The cooling tower can be made more efficiënt by making it
parachute shaped or tilting the package, although the 24 narrow tubes
do well enough in our Dutch climate. A 2” oil drum cap on top
allows access to rag the tubes. In one of the tubes is a 5 mm rod to
shake up the aggregate in the filter without the need of dismantling.
Soot and dust is flushed by condensate to a container.
Both small ones have cyclones, Tiny one, Dinyfier three. Very basic: a
1” main tube without cone, a 1/2” delivery tube,
flatened where welded to the main tube (carefully grind the internals).
And a 1/4” tube as central outtake tube. Stupid simple, but
very effective.
An oil bath filter works well as an after cleaner. Unfortunatly it also
collects condensate. Easily draining and filling of the oil must be
possible, because it has to be done frequently.
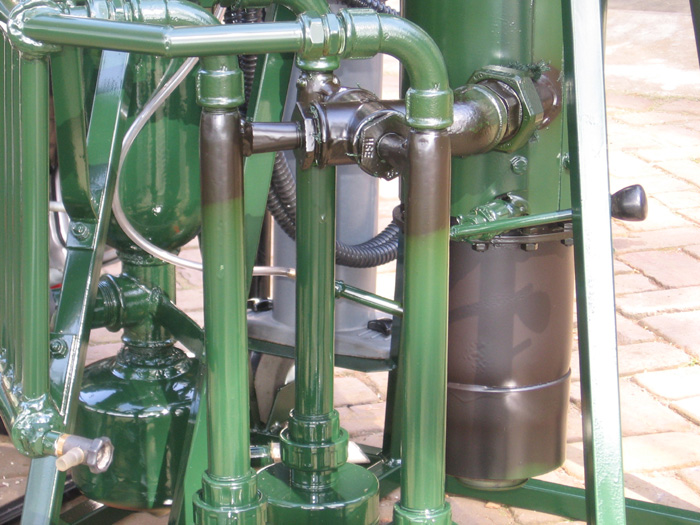
Mixer
The mixer is plain. It is a T fitting (cross on DJ-3), with the gas
entrance on the side. Secondairy air input on one end of the T and
mixture output on the opposite side. Extending the air entrance by a
short narrow tube into the mixture output makes the mixer acting like a
venturi and creates a kind of selfadjusting character. Upstream of the
mixer are a ball valve and an air filter. This secondary engine air
choke valve needs some adjustment on heating up after engine starting,
but after that you only may need to lean the mixture on refilling of
the fuel bin. Increasing pressure drops ask for re-adjustments.
Something will be wrong upstream.
When the gasifier is in balance and the protubing venturi tube in the
mixer is well dimensioned, there will be no adjustment necessary
between idle and full power.
Reheater
In order to prevent condensate entering the engine or mess up the
tubing between mixer and engine with a mix of unfiltered carbon black
and water condensate, you need to reheat the gas, the secondary air or
the mixture. When the gas leaves the cooler, it got rid of a lot of
condensate while cooling down. But it is still saturated. The pressure
drop after the mixer and after the throttle valve sweeps condensate
out. With an engine nearby, it is simple to make a reheater. Just have
hot exhaust gas flush around with some tubing.
Efficiëncy maniacs can try to use exhaust gas to pyrolyse the
fuel. Exhaust gas contains much more energy than newly made woodgas.
Engine adaptions
I made no adaptions to the engine, except for a small tube on the
airfilter support to attach the mixture hose on. Ignition advance will
bring you additional 10-15% power. Replacing the restrictive
carburettor and airfilter support by a straight wide tube helps too.
I did not choose for this, because I wanted DJ-3 to be able to run on
petrol too. Tiny is underpowered anyway, so it doesn’t ask
for adaptions.
Note that we in Western Europe use 50 Herz. Most electrical generators
are 1,500 rpm or 3,000 rpm. 3,600 rpm (60 Hz) is more difficult to
obtain on woodgas. It surely askes for extra ignition timing advance .
Running it on slow, longer combusting woodgas at full power without an
extra ignition advance head-start for long intervals, could overheat
and burn the exhaust valve from the still burning gases exiting. Re-key
the crankshaft or flywheel.
If the woodgasgenerator is not fixed to the engine, it might be
necessary to connect a horizontal (!) vibration rod to avoid bridging
in the fuel bin. When the grate is designed and positioned well, it
will also take over the job of the grate shaker. Tiny has no shaker and
doesn’t need one.
Dusty gas will ask for a more frequent oil change and head cleanout.
It’s soft non-abrasive character does not wear out the
engine.
Tar and other impurities
Oh yes, you will make tar. Probably you start with tarry gas. Or you
had luck with your first gasifier and make tar on experimenting with
other woods and dimensioning. Don’t be ashamed. One that
claims never to make tar, either lies or never achieved anything but
that single lucky incident. Sometimes, with a poor design or bad wood,
good motor grade fuel gas can never be produced.
This is the route from bad to good:
If you find very liquid, sticky, beige tar which glues an intake valve
within 10 minutes, you have your engine running on pyrolysis gas. Yes,
very powerfull, but not for long. Either the cracking temperatures are
way to low, or an internal leak allows pyroylis gas to bypass the
hearth.
Then there is tertiairy tar: the black goo. Sticks intake valves after
time. Wrong or wet wood, wrong dimensioning.
Soot. Now you are near. Soot is partially cracked tar.
Dust. Or carbon black. This is cracked soot. No worries, that is good.
“Freezing” (rapidly cooling to stabilize) the hot
gas after the grate can prevent soot and dust to some extent, but using
the waste heat energy out of the produced gases to put back into
primairy air and fuel is not really freezing these chemical reactions.
Every gasifier makes a certain amount of tar. The best ones only make a
small amount of non-condensable tars.
Your wife will tell you when your gasifier is operating tar-free.
Summary
Well, dear reader, I guess you come to the same conclusion as I do:
micro woodgasification is difficult to make perfect. It is also
contradictional: the need for micro gasification is high for common
people like you and me. But we have no luxury materials, nor exclusive
equipment. While, contrary to larger and more forgiving gasifiers, a
micro needs everything to be perfect.
Nevertheless it is possible to design and build a lowcost small
gasifier that does not ruin a good engine. Gas can be clean enough, not
leading to sticking valves. Although a carbon cleanout of the
cylinderhead may be needed from time to time.
Micro woodgasification is what it always has been: an emergency methode.
I do not consider myself a teacher or a master. I am still a student.
One that wants to learn. So please send me your experiences to Dutchjohn1st@yahoo.com.
Both good and bad. Both similar and opposite. Do not be shy or ashamed.
One cannot learn whithout stepping over borders and mess up from time
to time.
Thanks for your attention, I hope you enjoyed the ride.
Dutch John
Netherlands
top